Apply
amazing Textured effect to your images files with
Photoshop CC 2024
|
Previous
Top
Next
|
First, read this tutorial
if you haven't installed the Imagelys Plugin for Photoshop.
You can apply Textured effect to your images files very easily
with Photoshop CC 2024. For PC.
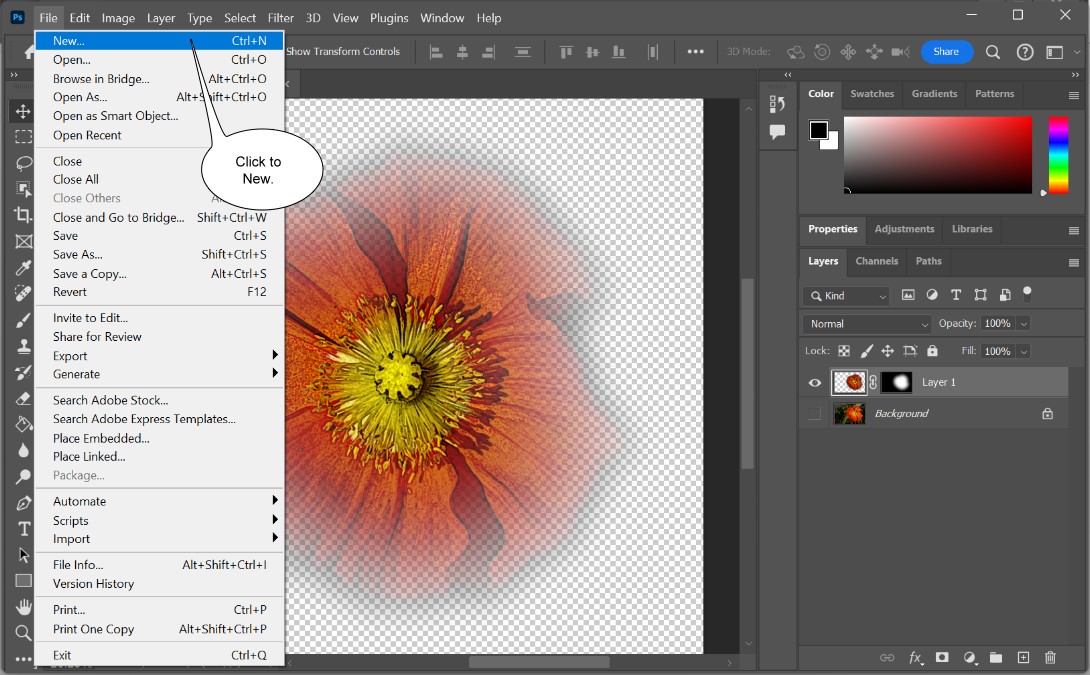
 Step 1 Step 1
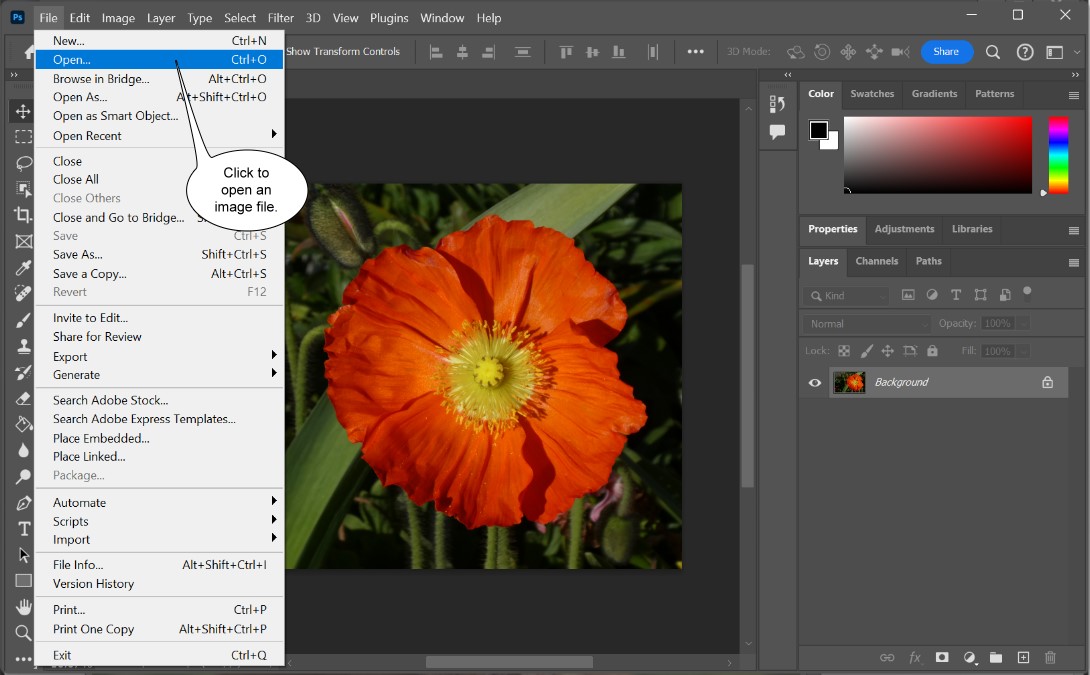
With Photoshop, in the main menu, click to open and
choose an image file.
Step
2
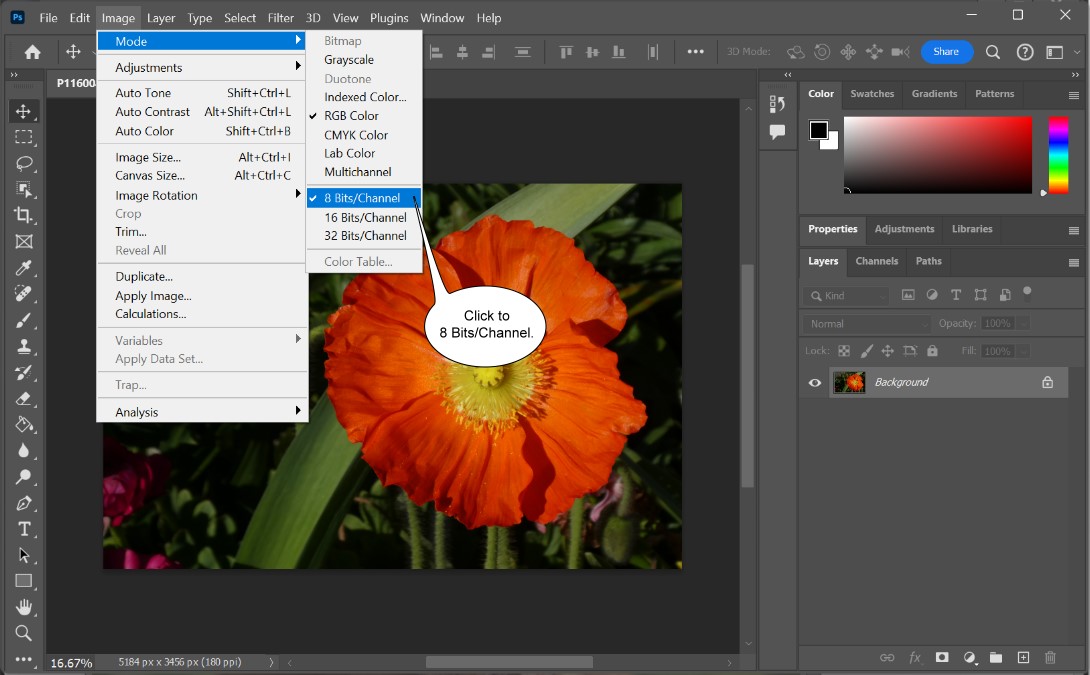
Now, in the Image menu, Click to Mode 8 Bits/Channel.
Step
3
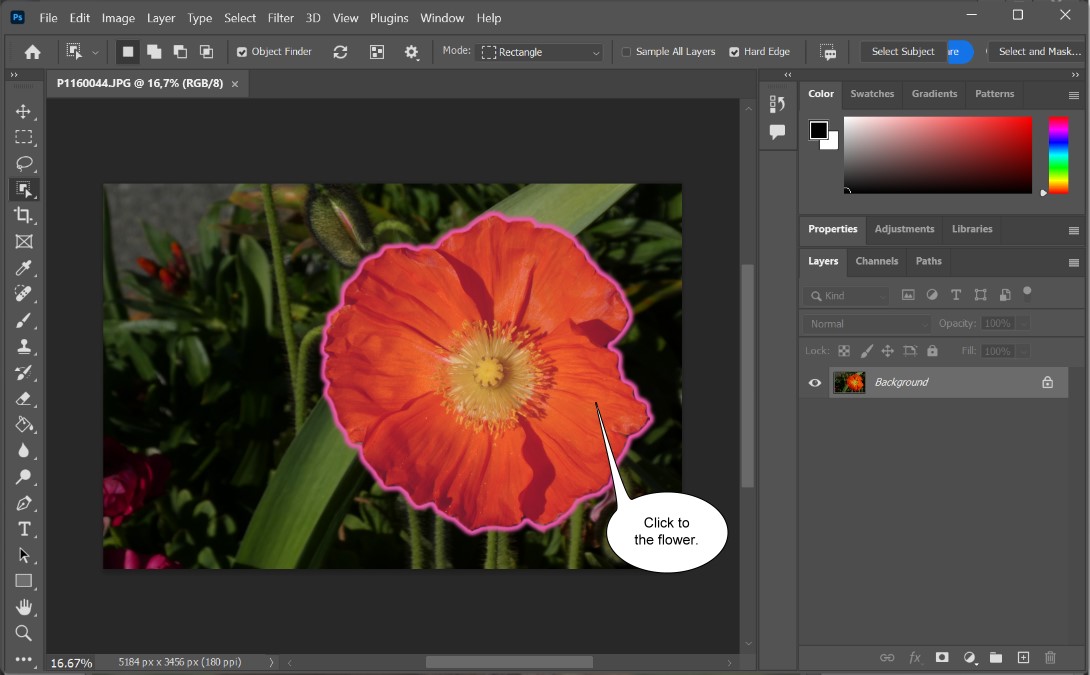
Now, in the main toolbar, click to Object Selection tool.
Step
4
Now, click into the flower to make a selection.
Step
5
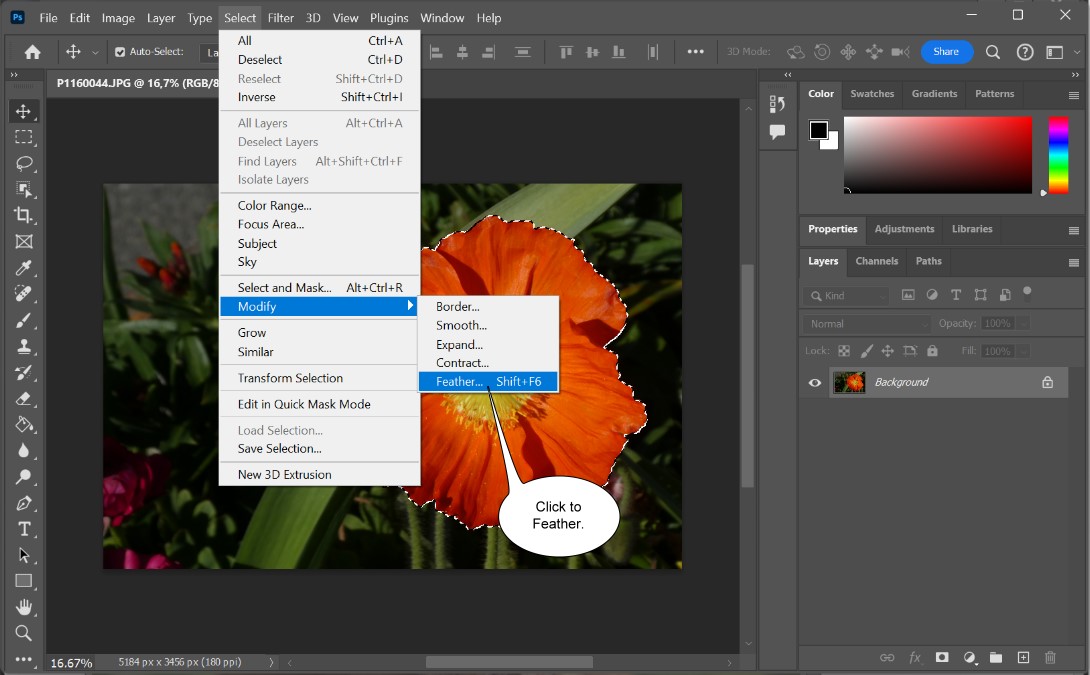
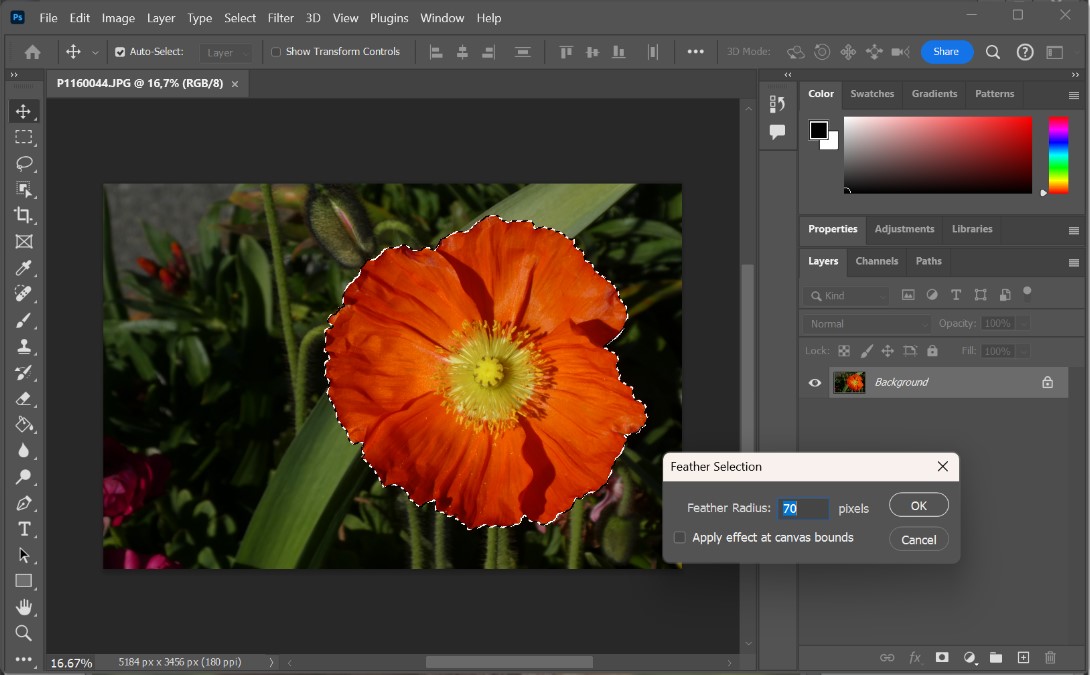
Now, you can click into the Select -> Modify menu to Feather.
Step
6
Now, set the Feather value to 70 and click to OK.
Step
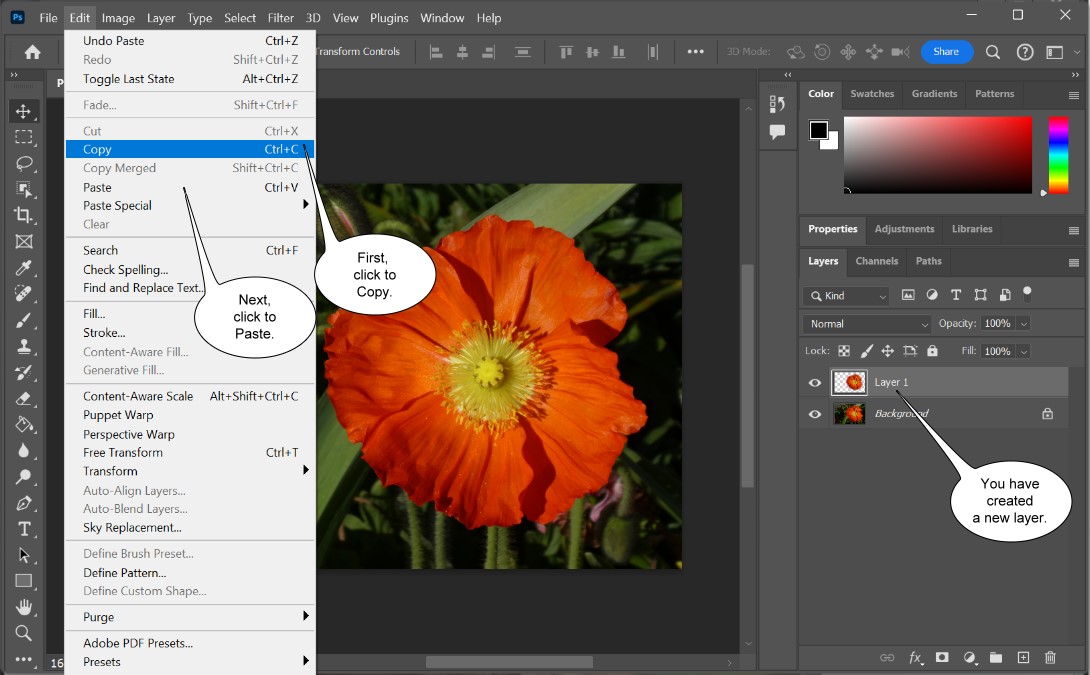
7
Then, in the main menu, click to Copy and next click to Paste
for create a new layer.
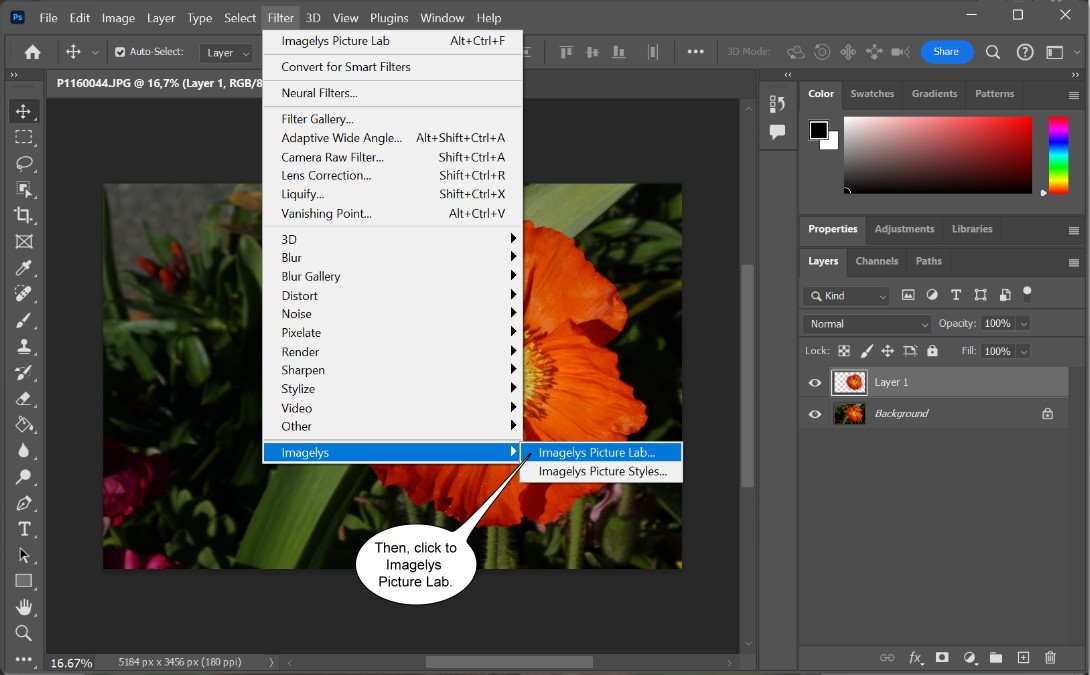
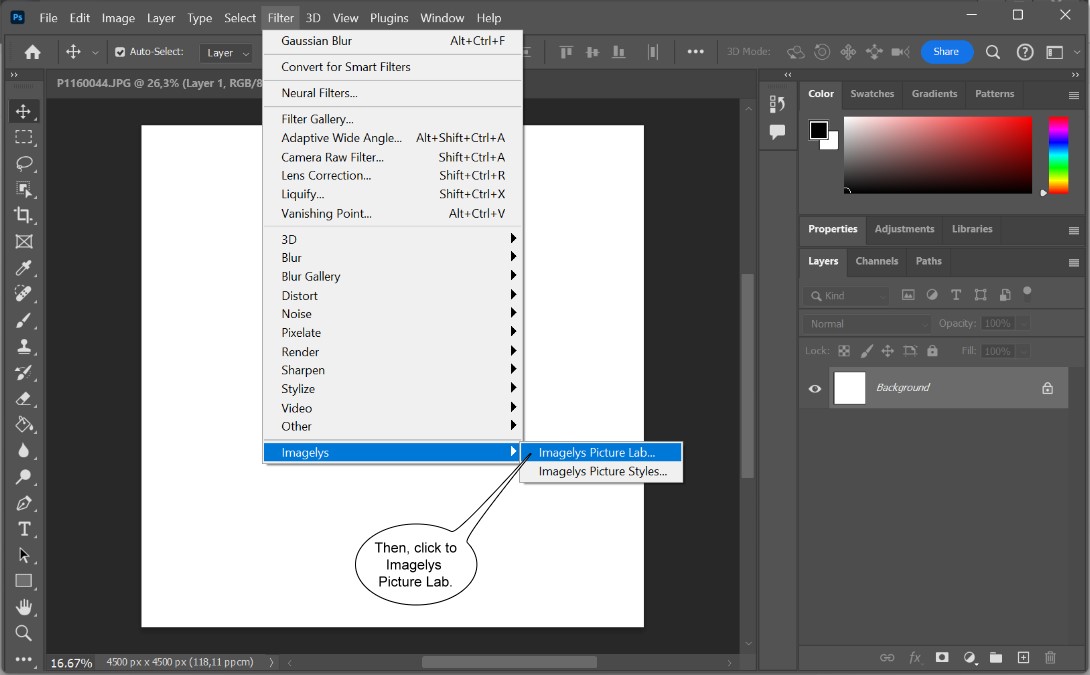
Step
8
Next, into the Filter menu, click to Filter -> Imagelys
-> Imagelys Picture Lab.
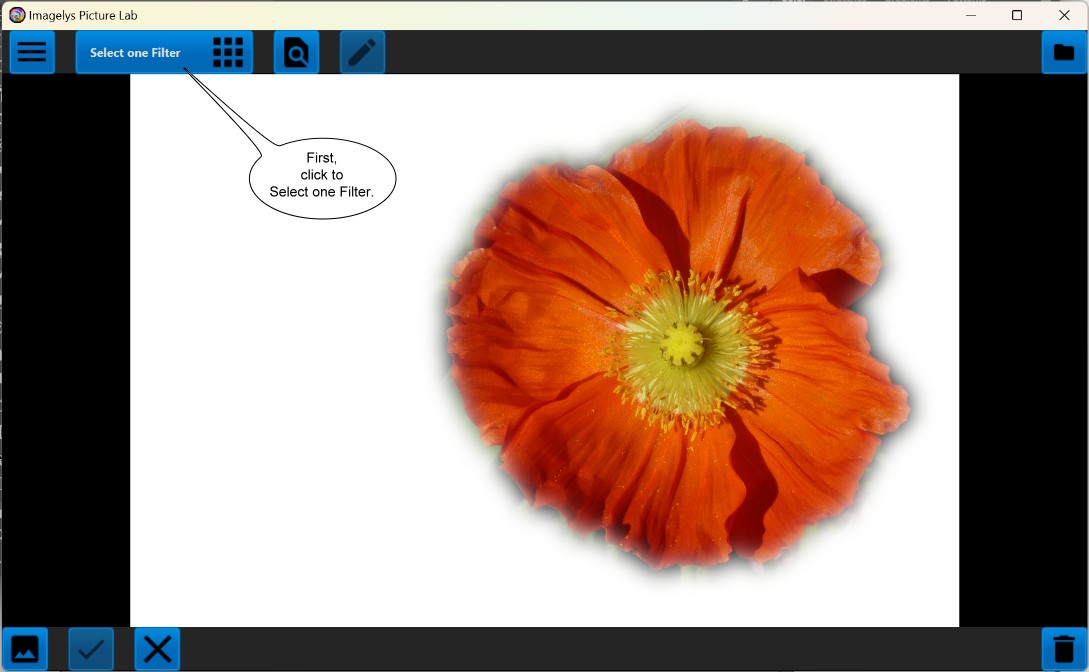
Step
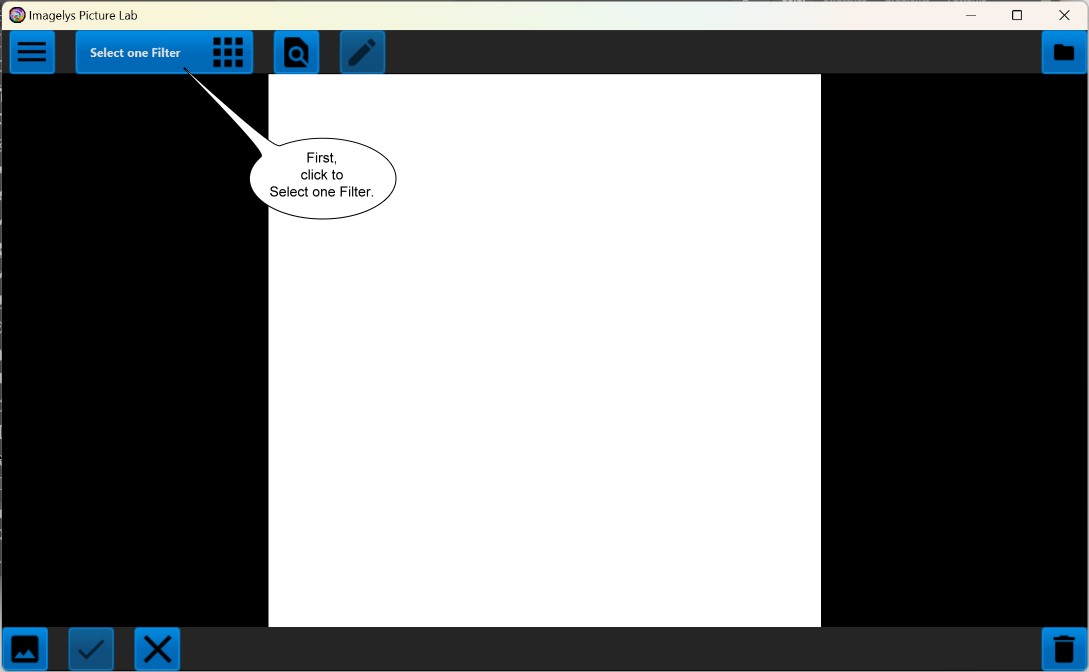
9
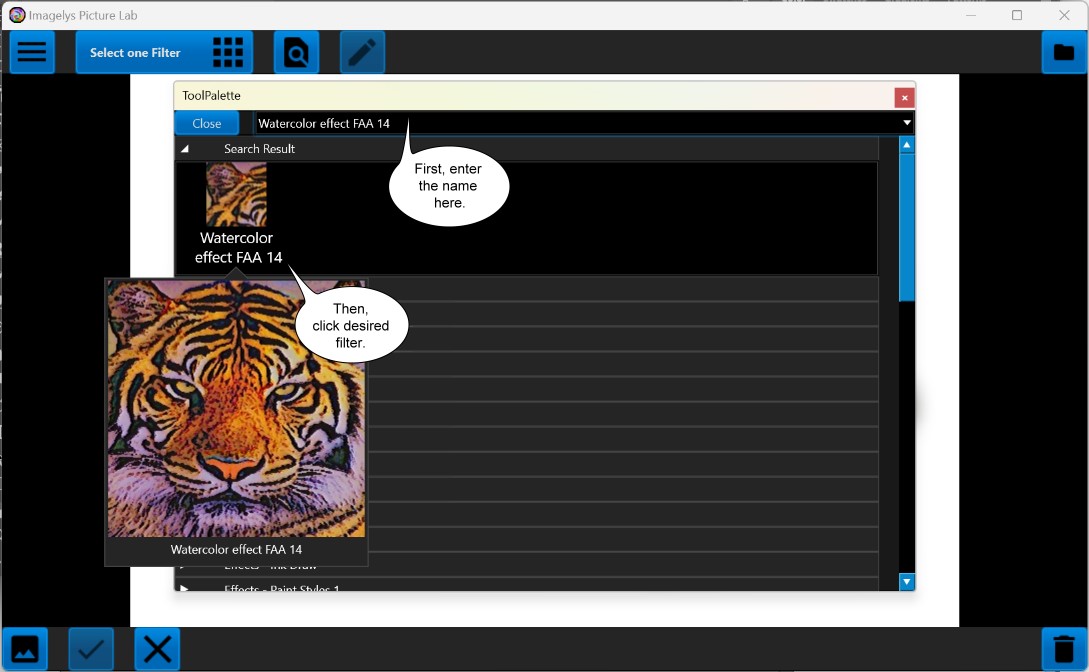
First, click to Select one Filter for open the ToolPalette.
Step
10
Now, in the ToolPalette, find Watercolor effect FAA 14 and
click of the filter icon. You can modify this filter settings.
Step
11
You can modify the Watercolor effect values to change the aspect
of the Watercolor.
Uncheck the Egalize Brightness node. Now, Apply the effect.
Step
12
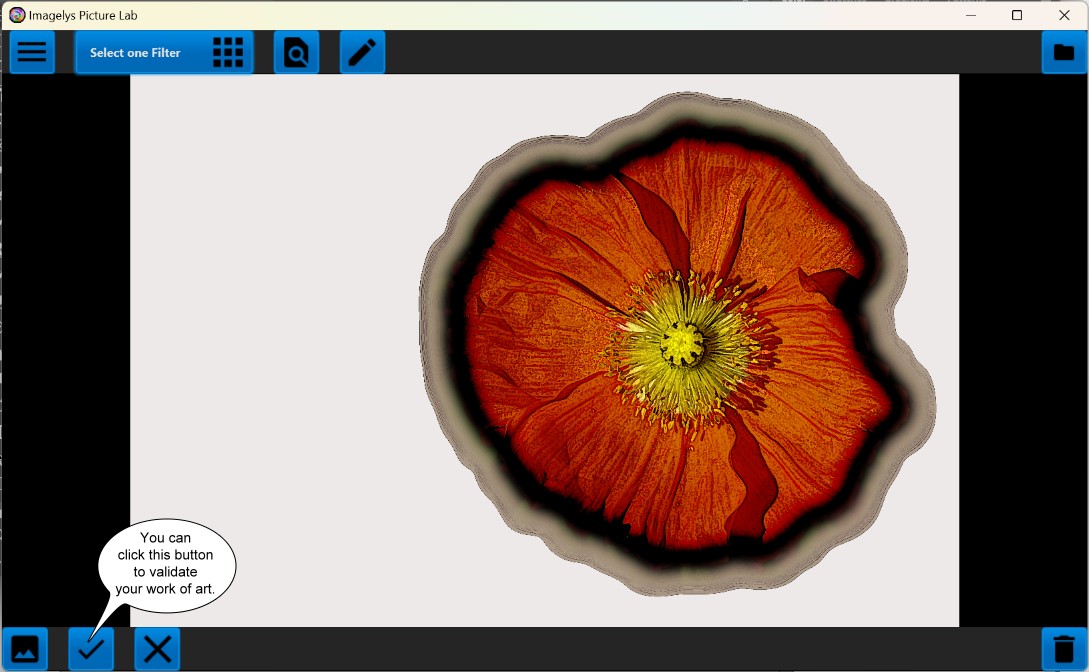
After a little while (the rightmost portion of the status bar
shows the progress), the rendered effect will be displayed.
Now, click to validate your work.
Step
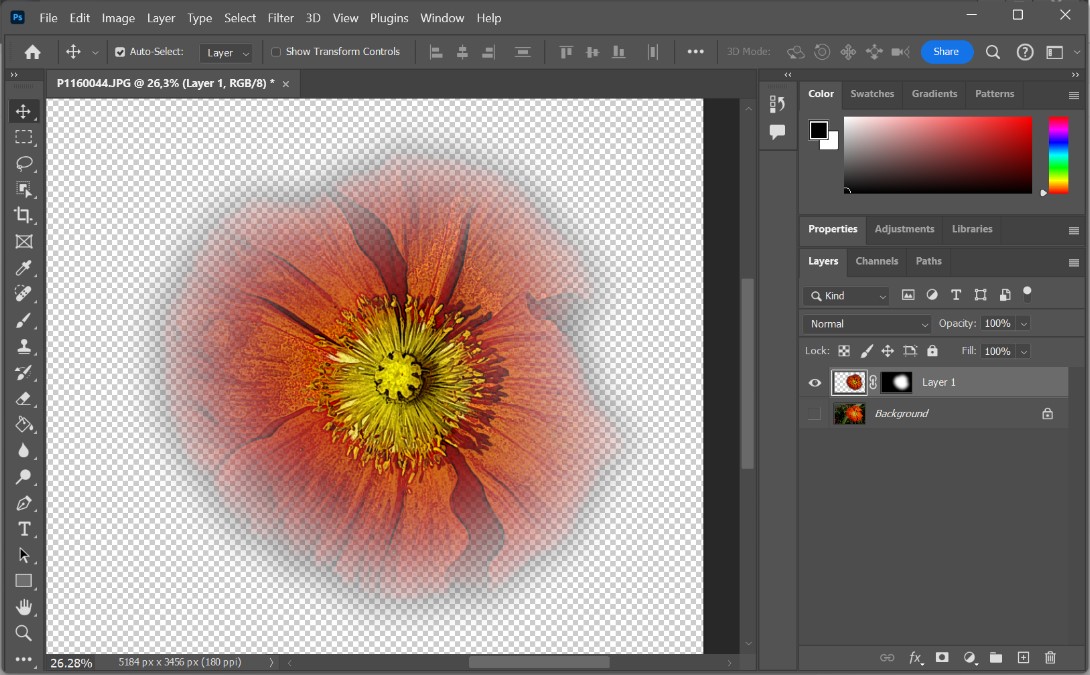
13
The result is showed into Photoshop.
Step
14
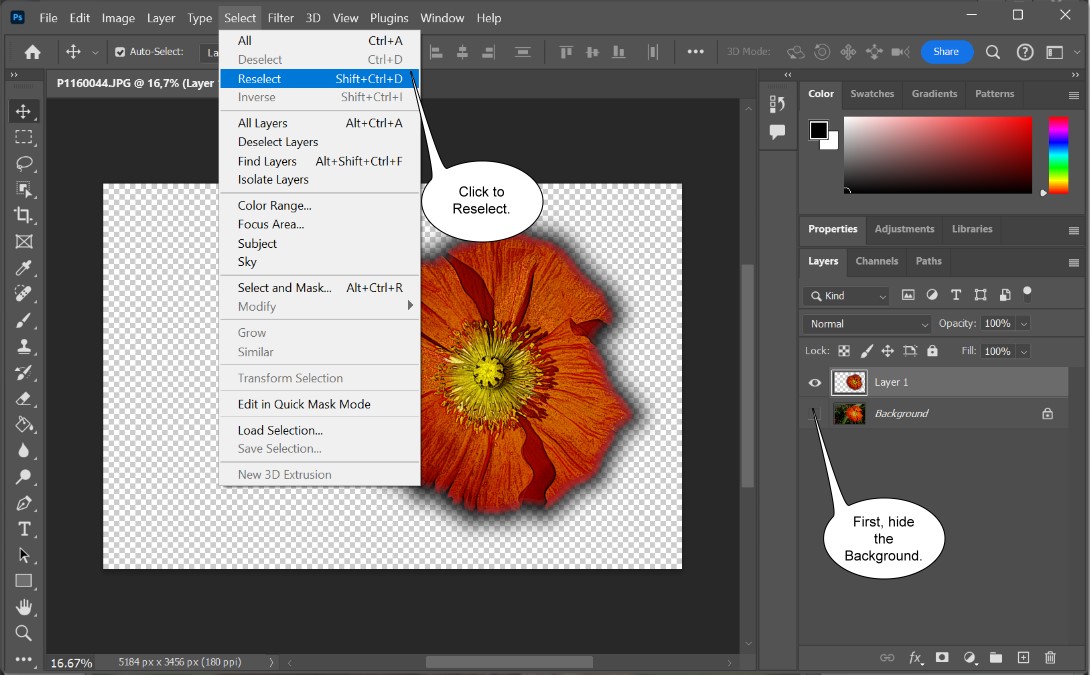
First hide the Background. Then, click into the Select menu
to Reselect.
Step
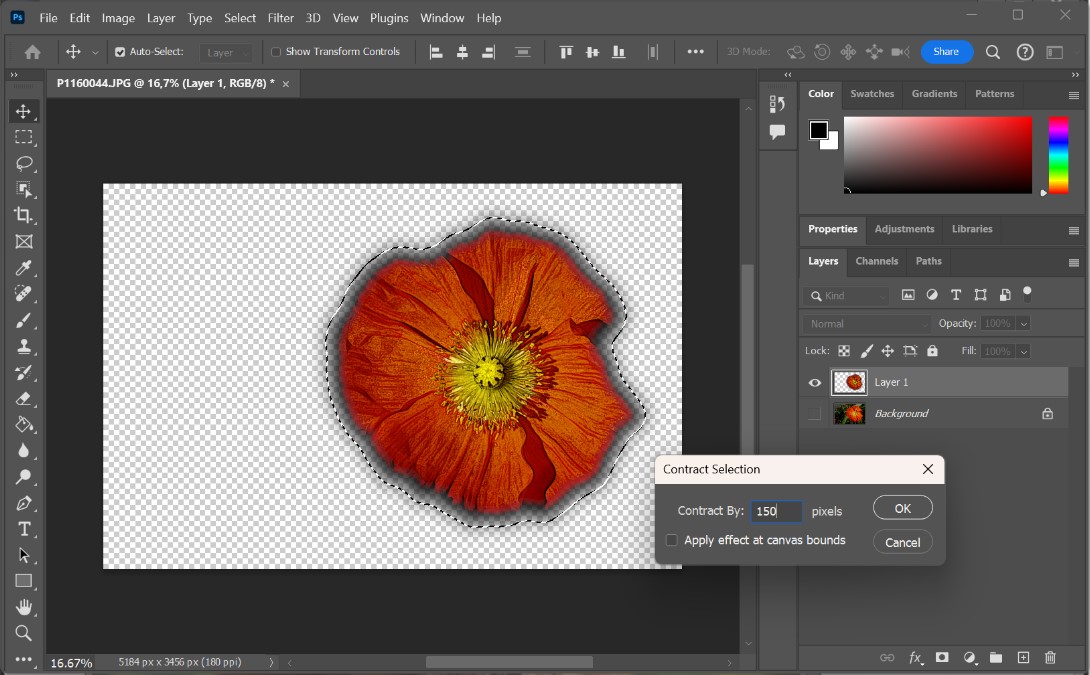
15
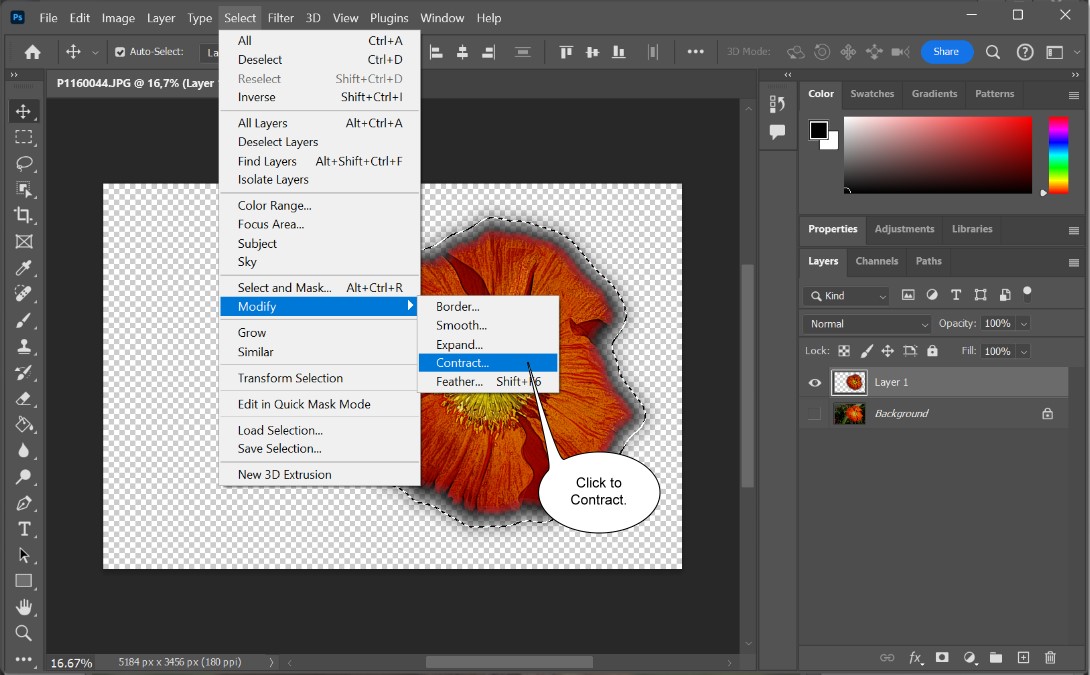
Now, click into the Select -> Modify menu to Contract.
Step
16
Now, set the Contract value to 150 and click to OK.
Step
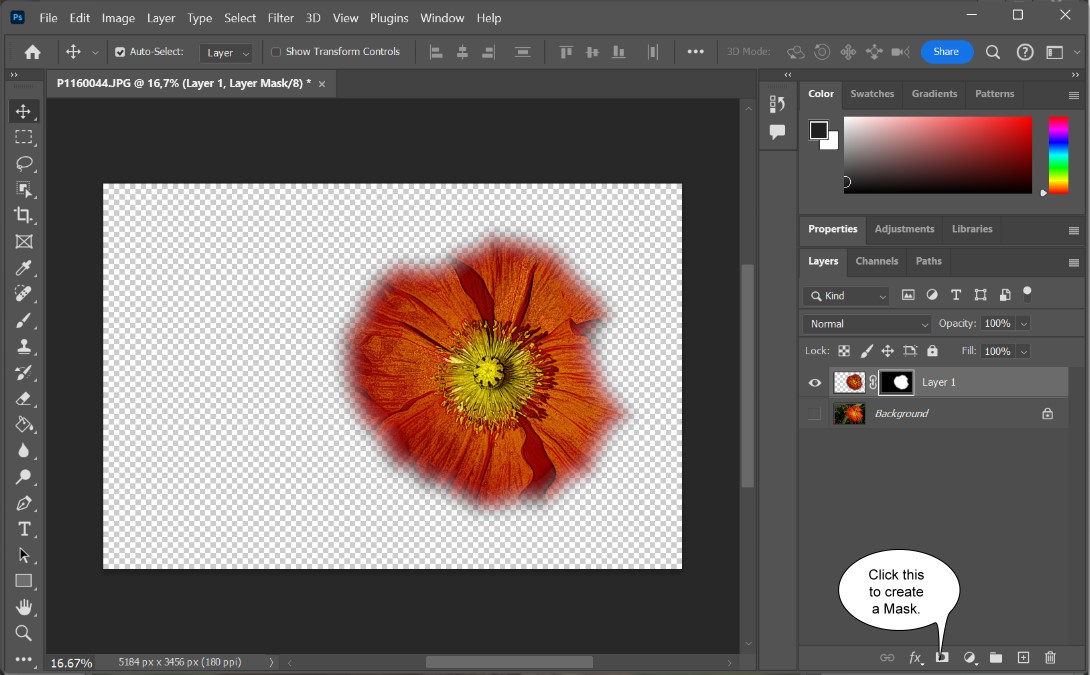
17
Now, click to create a mask of the layer.
Step
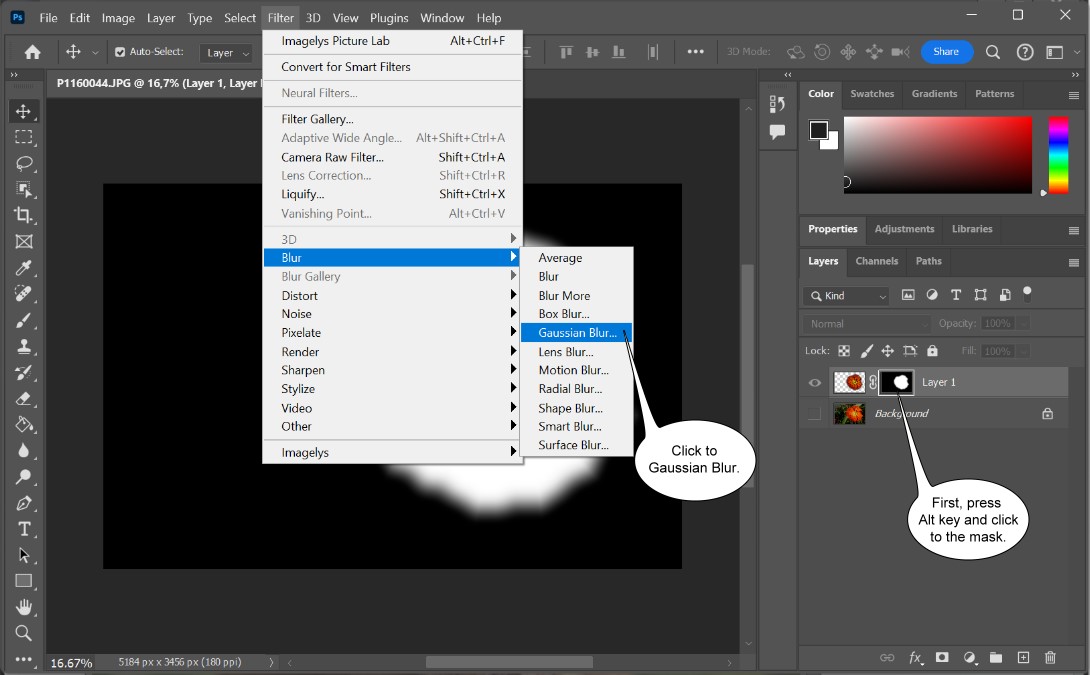
18
First press the Alt key and click to the mask. Then, click
to Blur -> Gaussian Blur.
Step
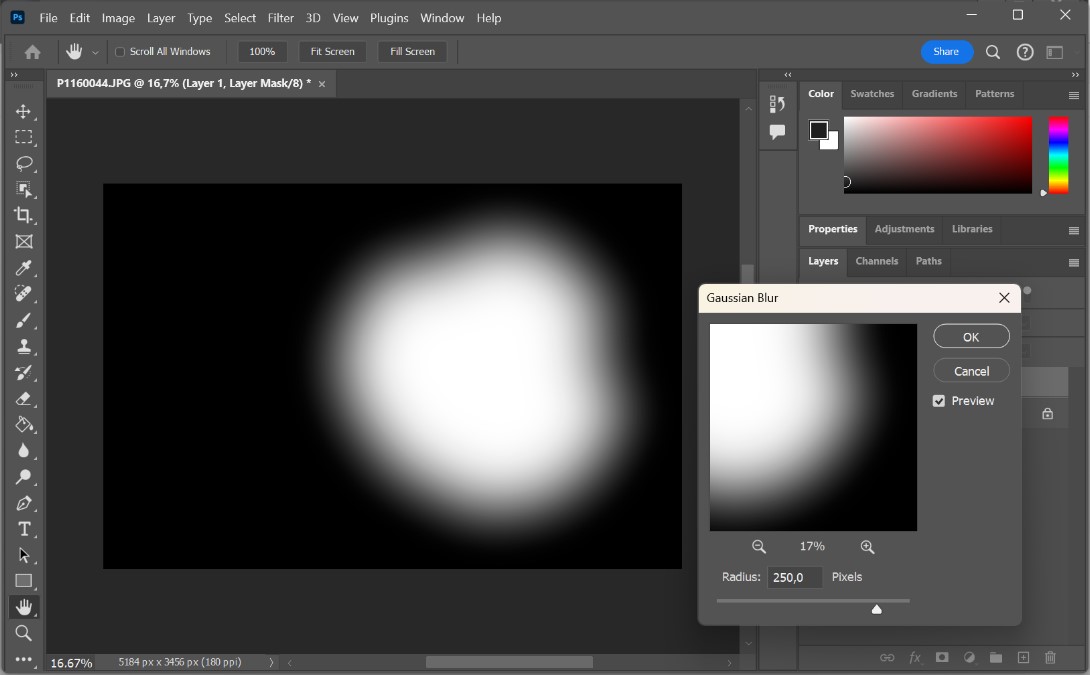
19
Now, set the Blur value to 250 and click to OK.
Step
20
Step
21
Now, click to New and create a new image.
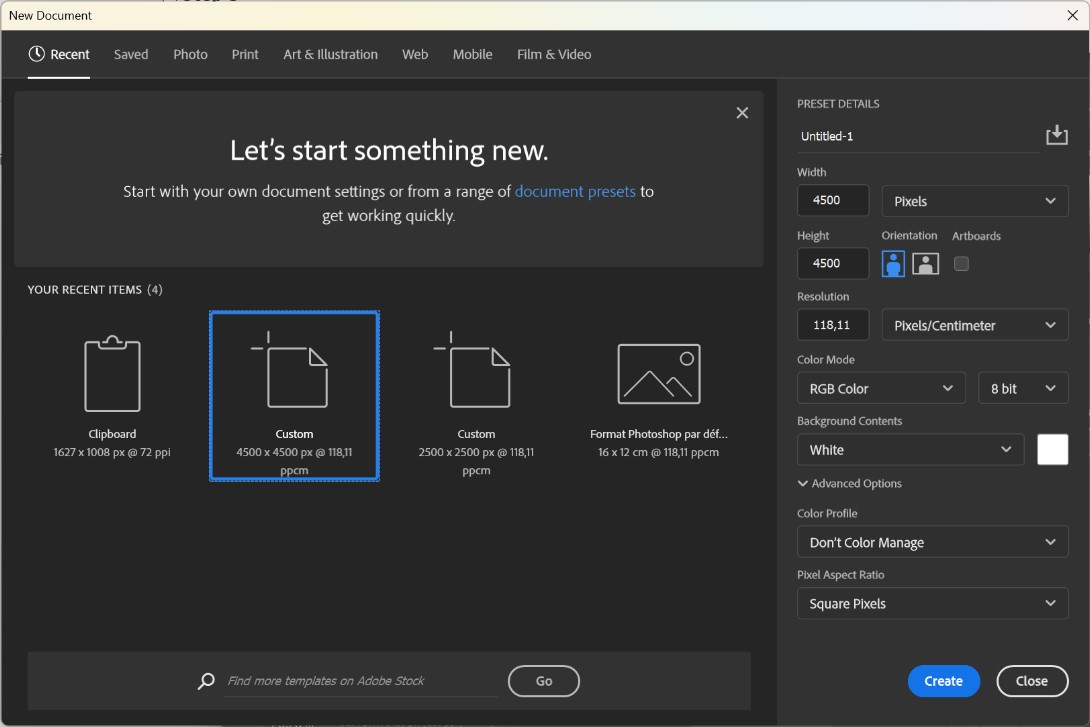
Step
22
Set the value to 4500x4500 pixels and click to OK.
Step
23
Next, into the Filter menu, click to Filter -> Imagelys
-> Imagelys Picture Lab.
Step
24
First, click to Select one Filter for open the ToolPalette.
Step
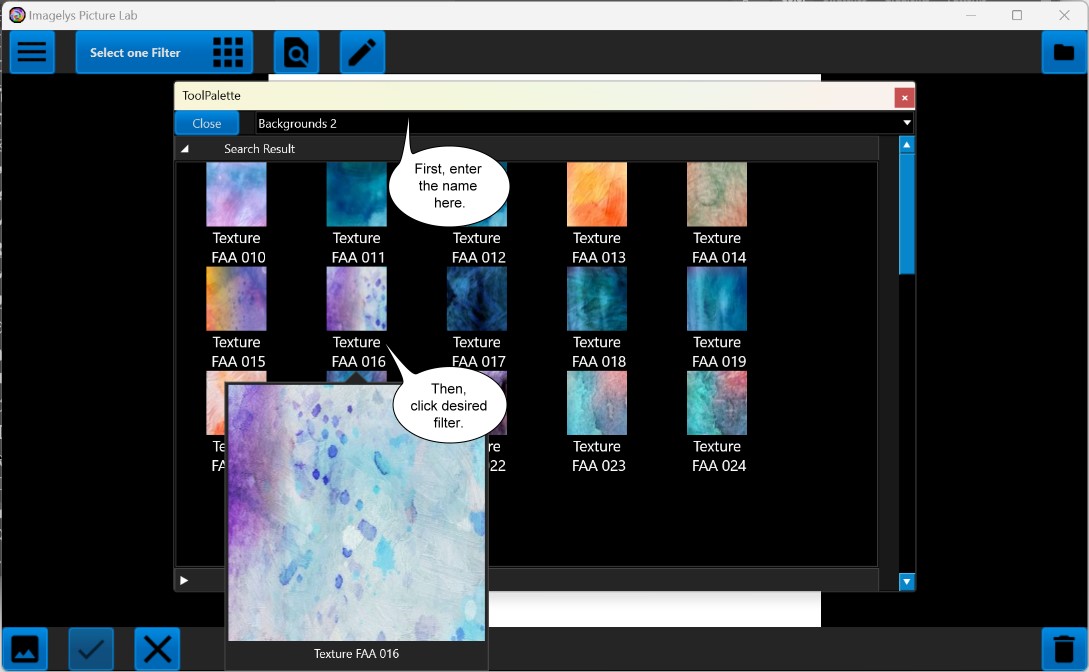
25
Now, in the ToolPalette, find Backgrounds 2 and click of
the filter icons of Texture FAA 016. You can modify this filter
settings.
Step
26
You can modify the Watercolor Pattern values to change the
aspect of the Watercolor Pattern effect. Now, Apply the effect.
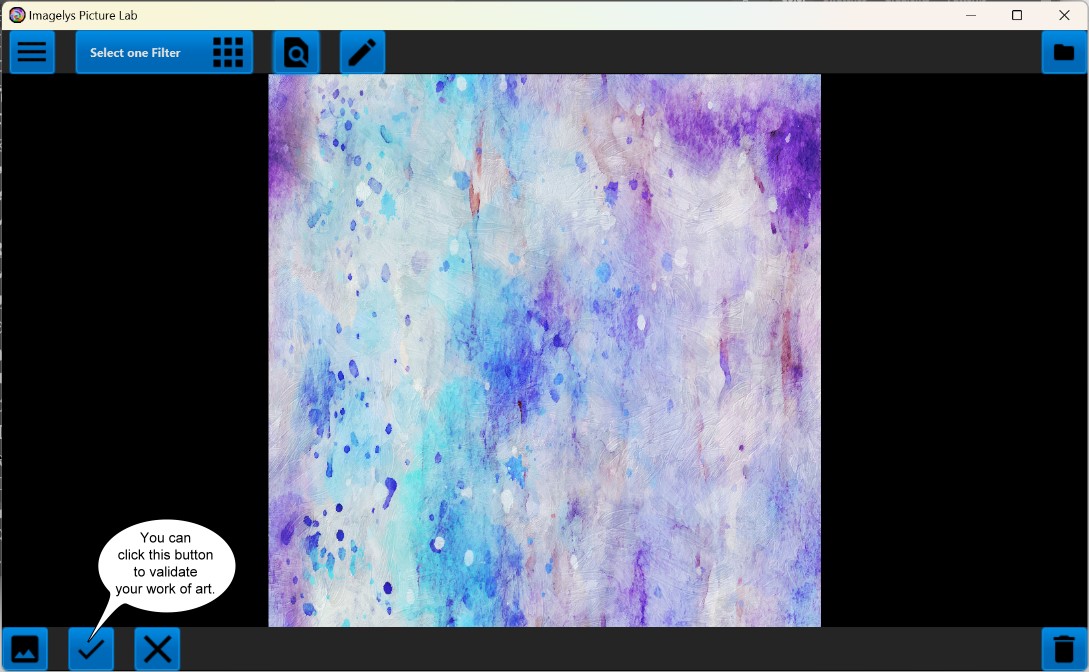
Step
27
After a little while (the rightmost portion of the status bar
shows the progress), the rendered effect will be displayed.
Now, click to validate your work.
Step
28
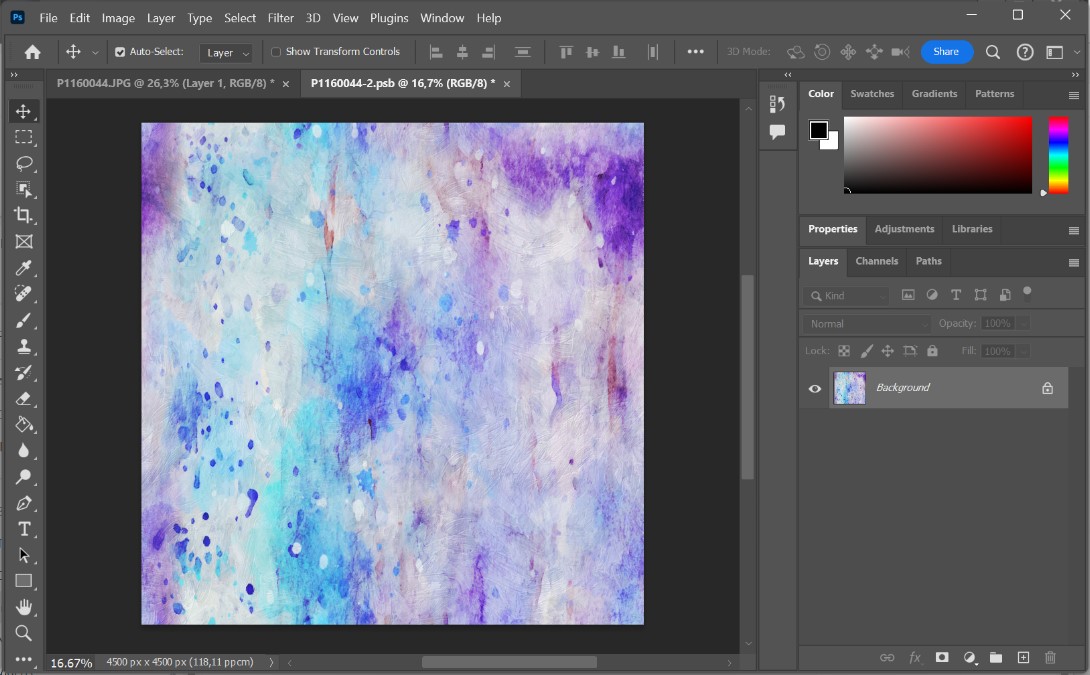
The result is showed into Photoshop.
Step
29
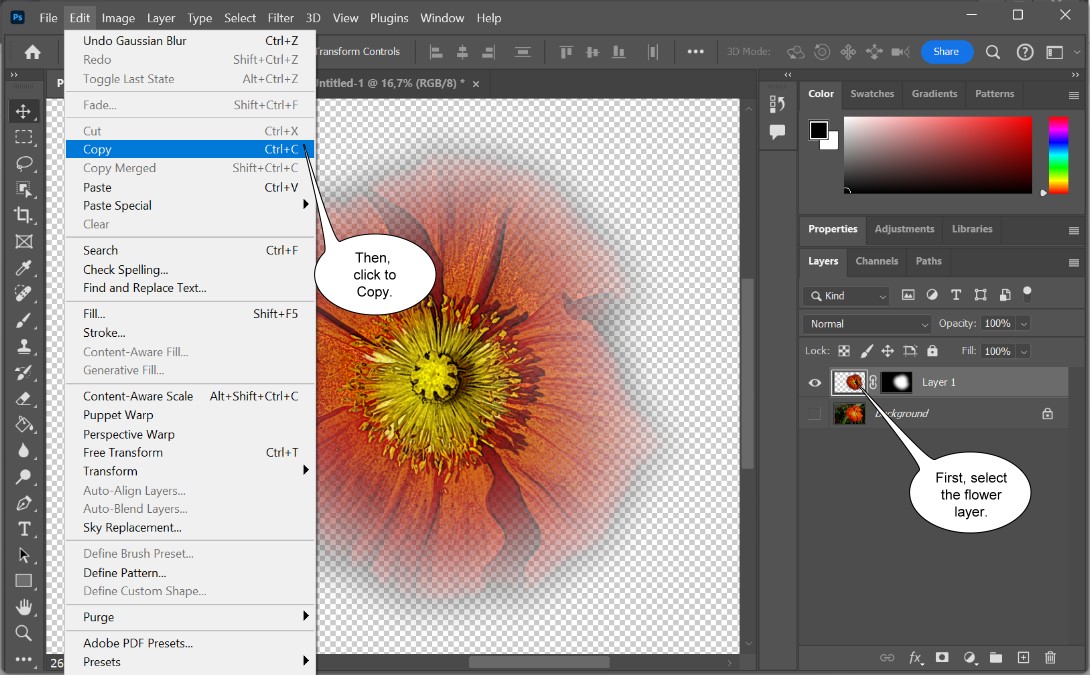
First, select the flower layer and click to Copy into the
Edit menu.
Step
30
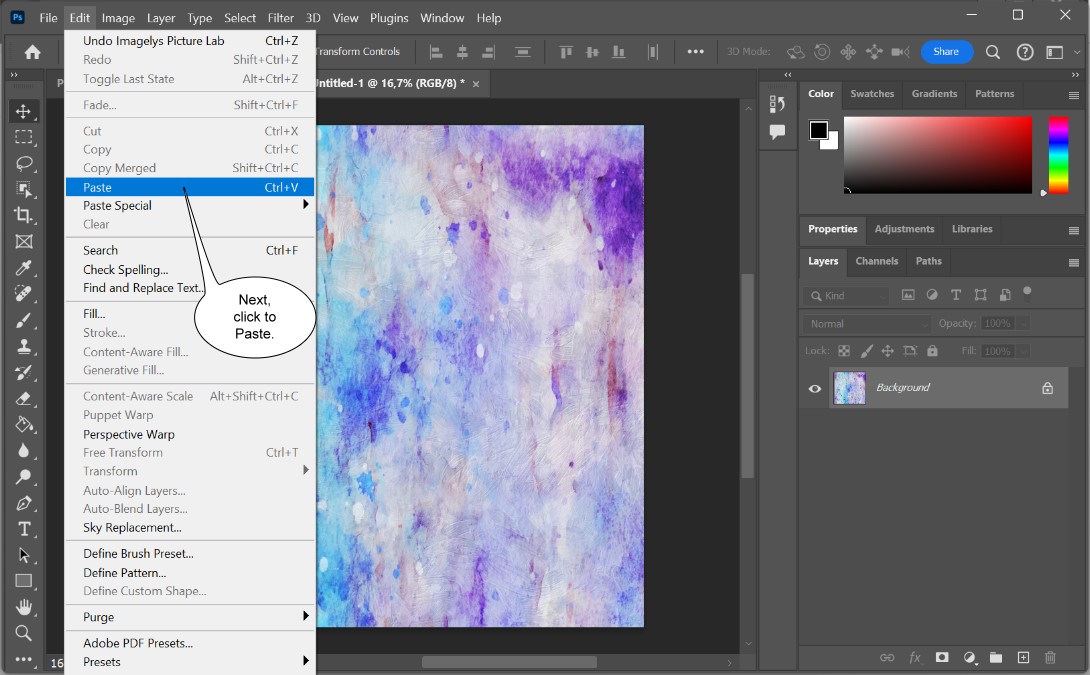
Then, select the texture image and click to Paste.
Step
31
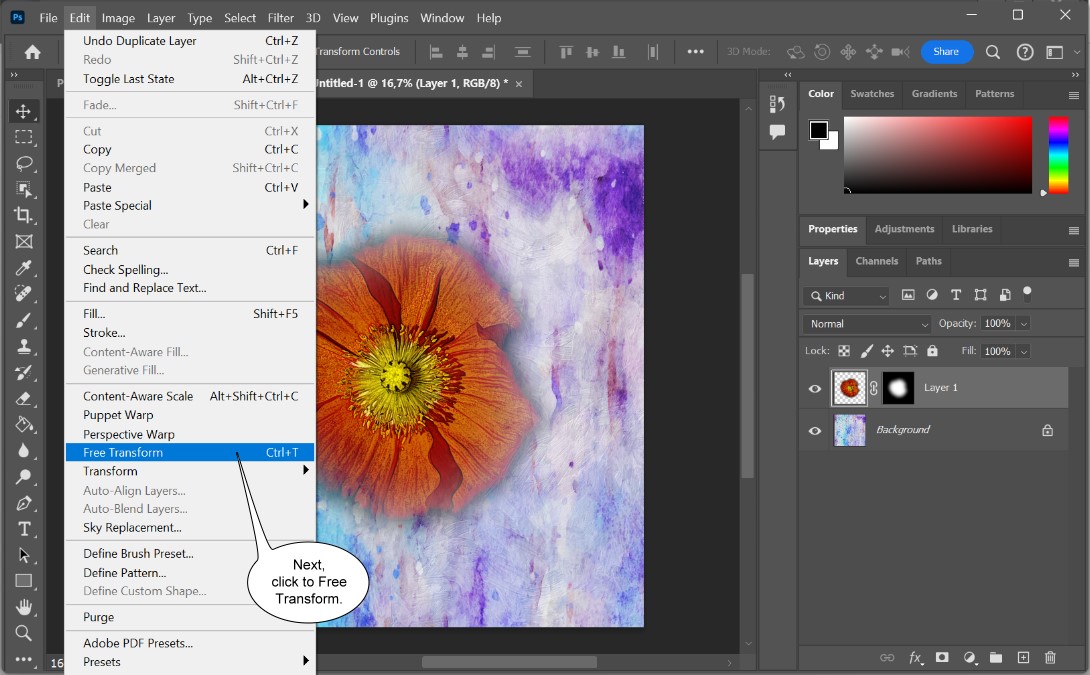
Now, click to Free Transform into the Edit menu.
Step
32
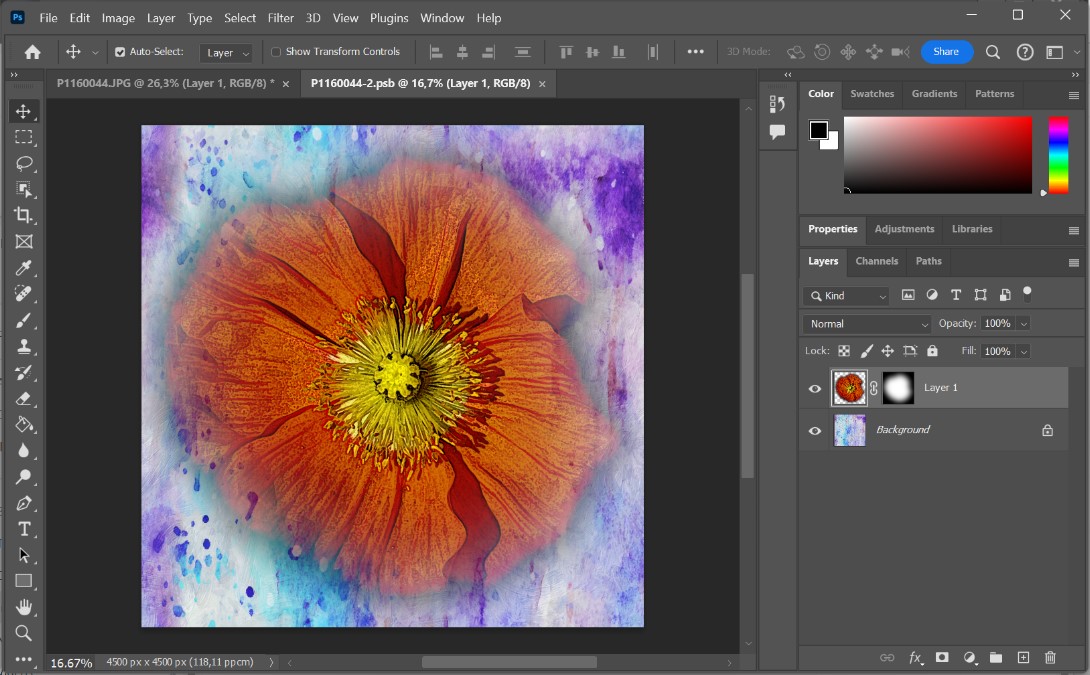
Then, you can adjust the size of the flower.
Step
33
The result is showed into Photoshop.
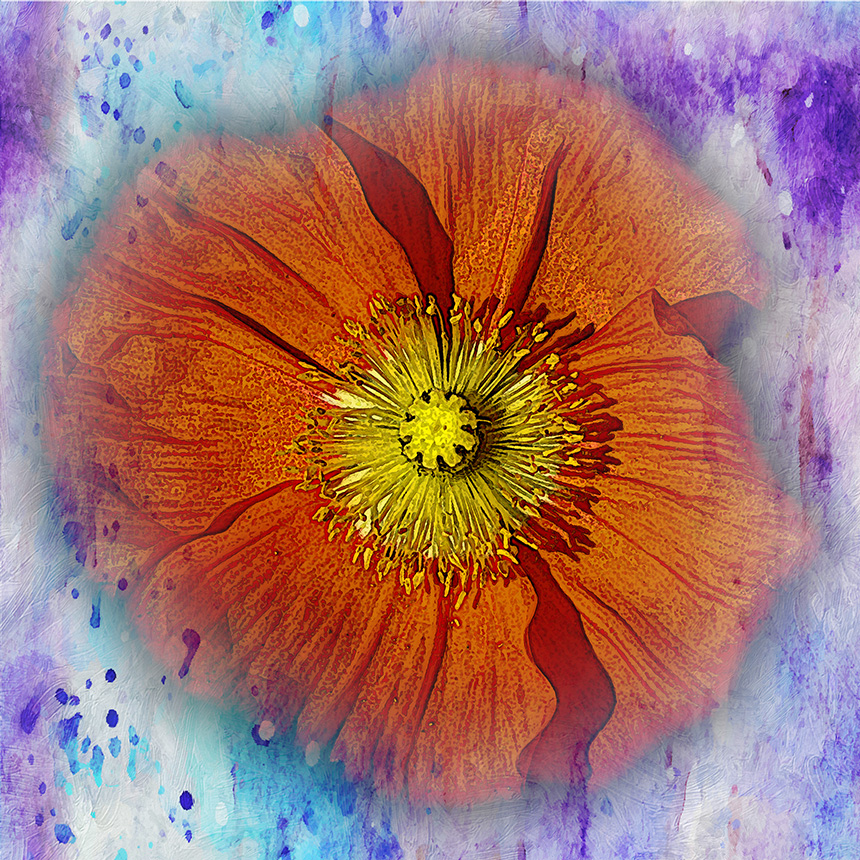
The result of Textured effect.

Other examples of Textured effect.
|